
Wall drain · patented
Wall-In Imperia. The drain disappears into the wall.
The world's first wall drain that can be cut to size. The drain body sits inside the stud wall and the shower floor stays uninterrupted.
Build-up
Finely adjusted, quickly installed.
The patented adjustable eccentric flange allows fine levelling, and the drain body adapts to the tile thickness. Installation stays simple and fast.
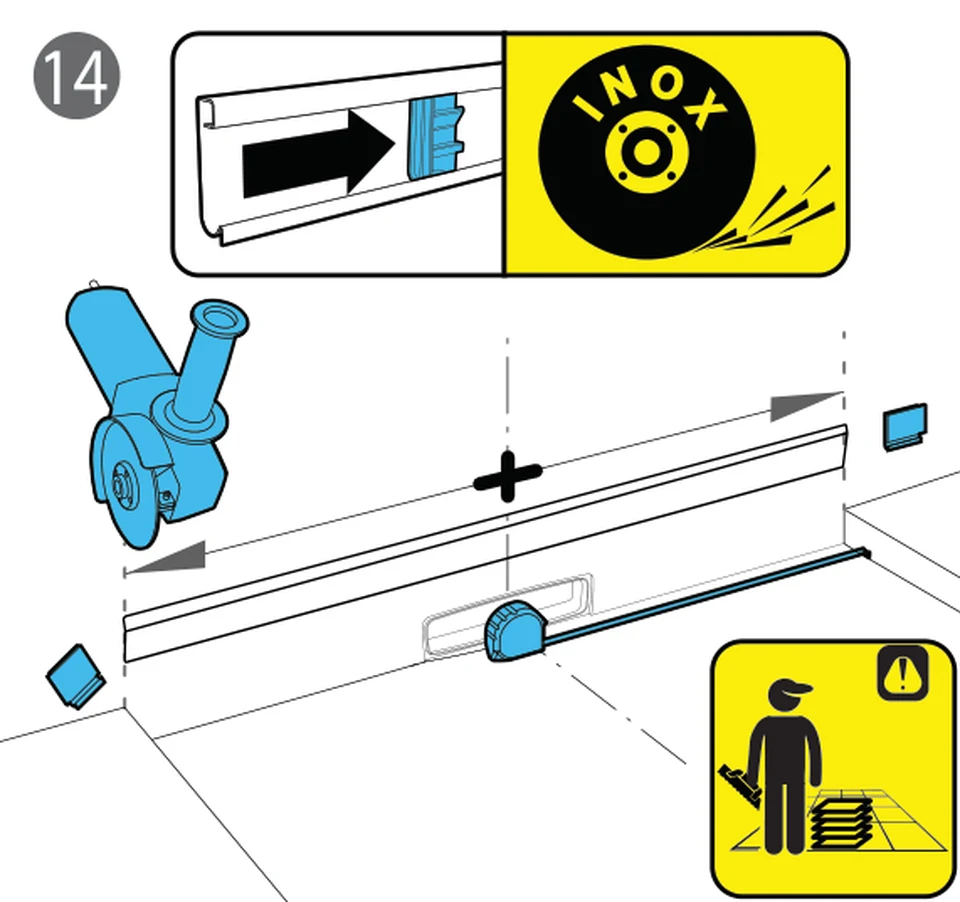
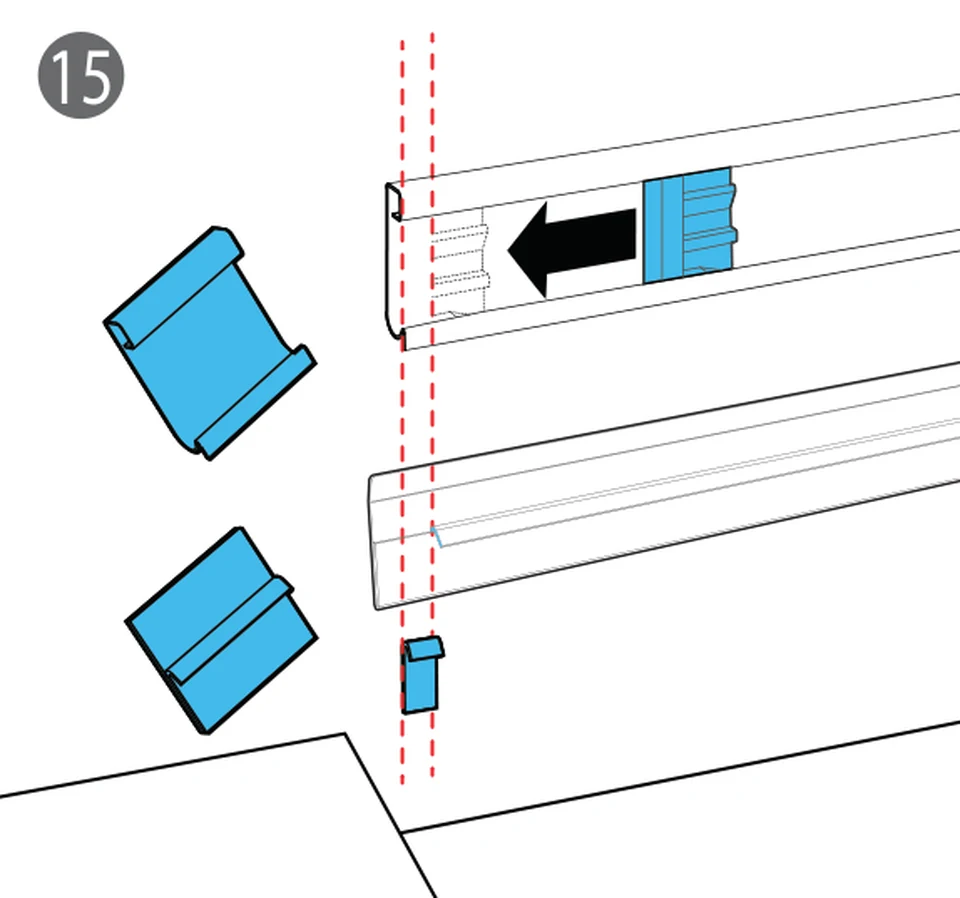
Channel body and cover can be cut to any size from 30 cm.
From shell to tile.
Keep scrolling: three steps, one picture.
Build-up
Every part of the set.
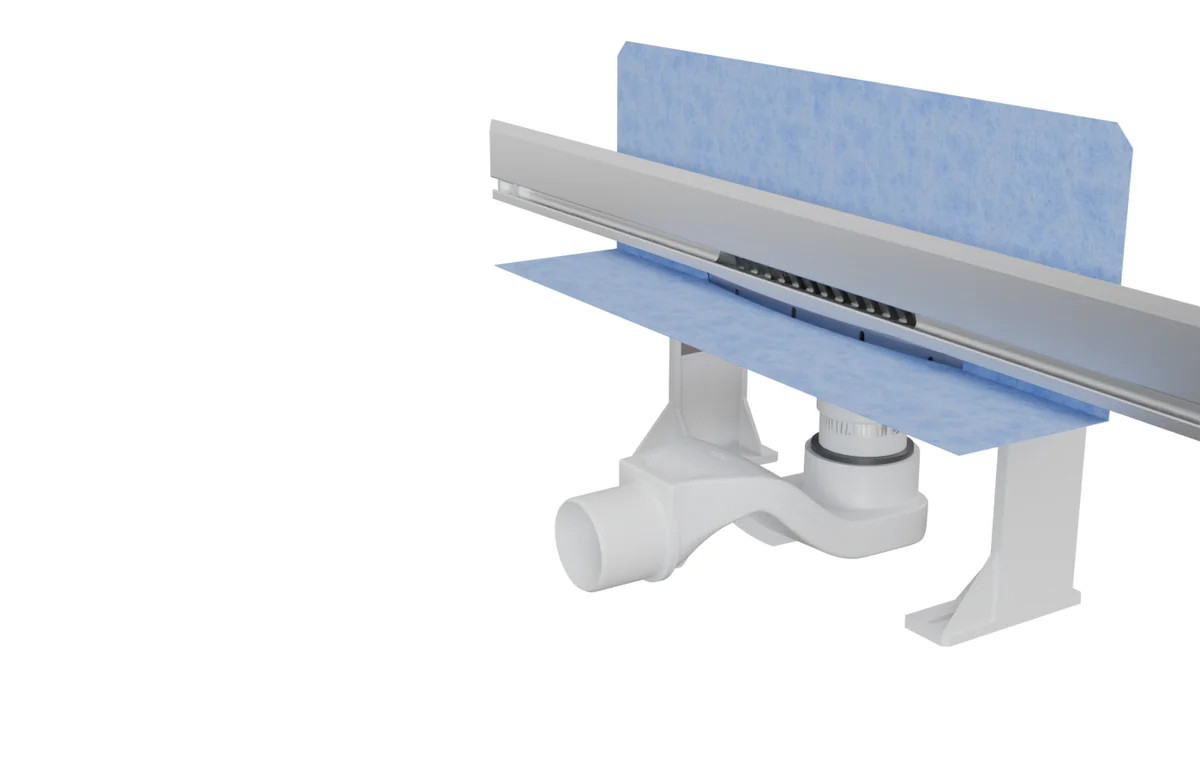
Scroll: the full metal cover, the frame, the flush-mounted box, the drain body with the textile flange, the levelling parts and the siphon come apart.
The waterproofing membrane is fitted in the factory and connects to the bonded waterproofing. The eccentric flange levels the body to the tile thickness, and the siphon stays accessible from the front.
Everything in the picture is part of the delivery.
Technical data.
| Material | Stainless steel 1.4301 / V2A (AISI 304) |
|---|---|
| Lengths | 80 · 100 · 120 cm, can be cut from 30 cm |
| Build height | 60–125 mm |
| Installation steps | patented eccentric flange for fine levelling, drain body adapts to the tile thickness |
| Drain | DN 50 outlet, trap |
| Waterproofing | Waterproofing membrane, abP; connects to the bonded waterproofing |
| Testing | abP, EN 1253 |
Ordering information.
Four stock variants, plus project lengths.
| Item number | Size | Surface |
|---|---|---|
| LW12 · Full metal coverStainless steel cover, cut to size on site from 30 cm. | ||
| LW12-H24L80E1 | 80 cm | Brushed stainless steel |
| LW12-H24L100E1 | 100 cm | Brushed stainless steel |
| LW12-H24L120E1 | 120 cm | Brushed stainless steel |
| LW12-H24L120E9 | 120 cm | Brushed anthracite |
| Made for your project — special lengths, finishes, sizesNot held in stock; lead time on request. | ||
| LW12-H24L30E1Project | 30 cm | Brushed stainless steel |
| LW12-H24L140E1Project | 140 cm | Brushed stainless steel |
Identical for every variant: Material Stainless steel 1.4301 / V2A (AISI 304) · Outlet DN 50
Special lengths on request. Every channel can be cut to size on site.
Installation in five steps.
The order follows the site: shell first, tile last.
Installation
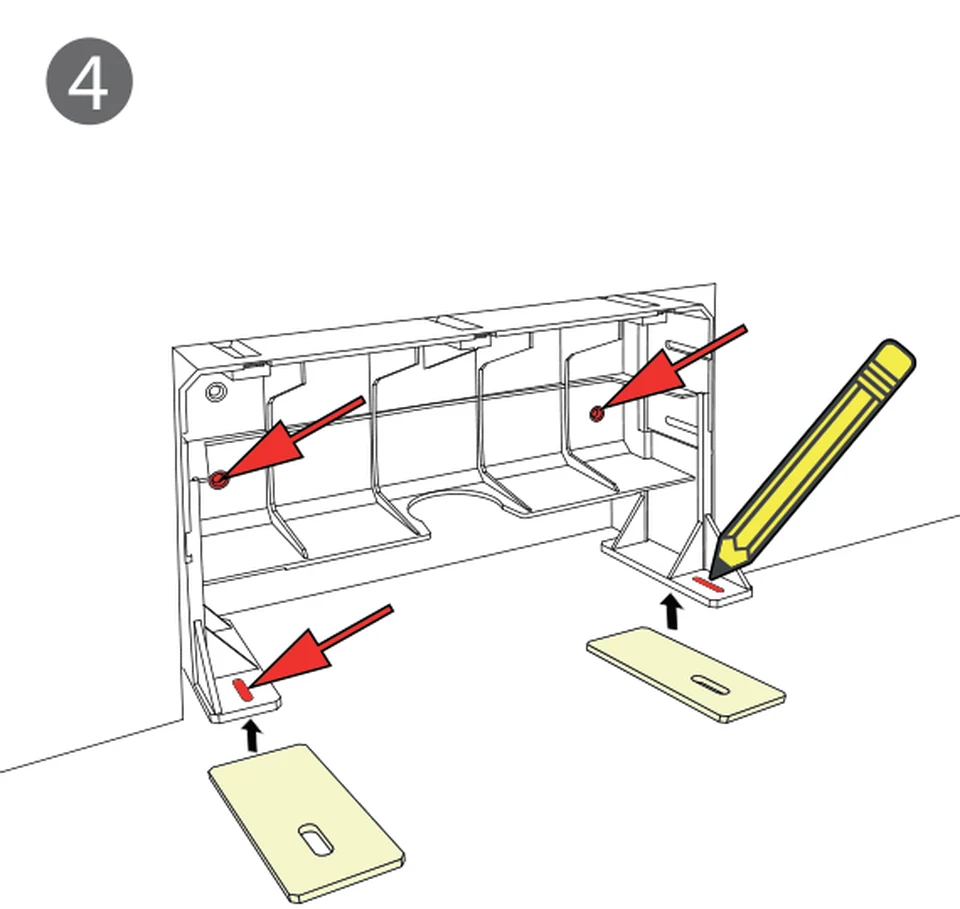
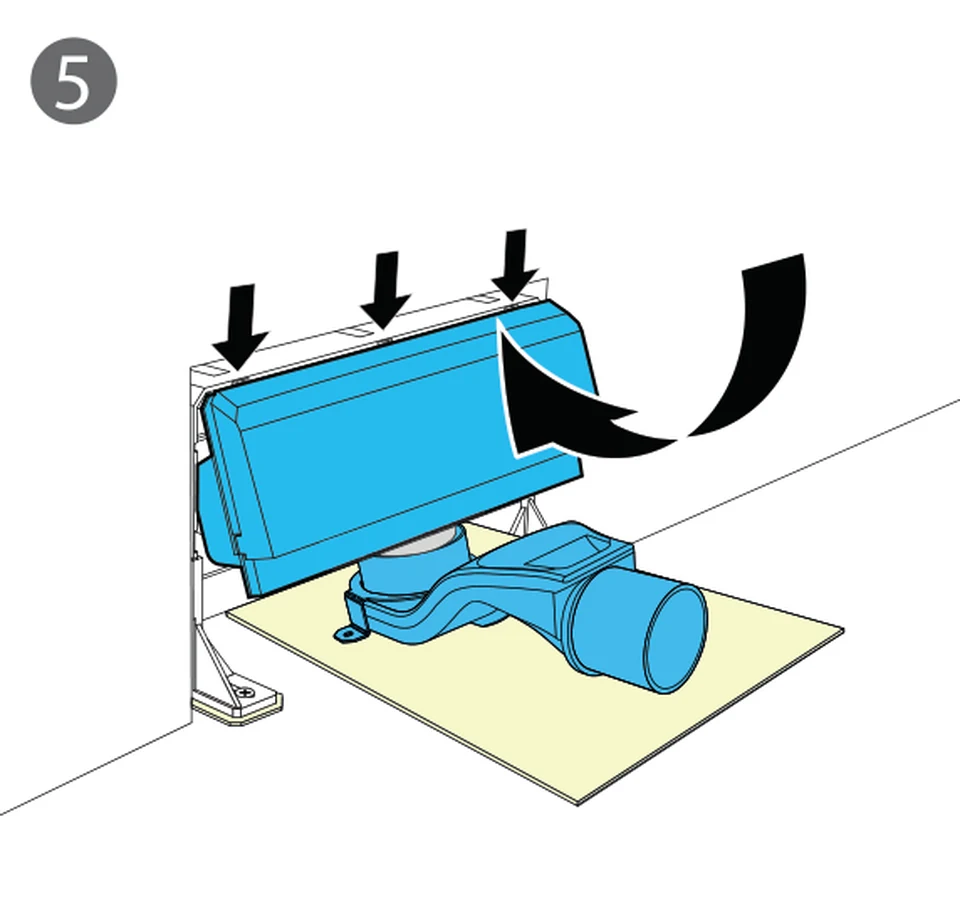
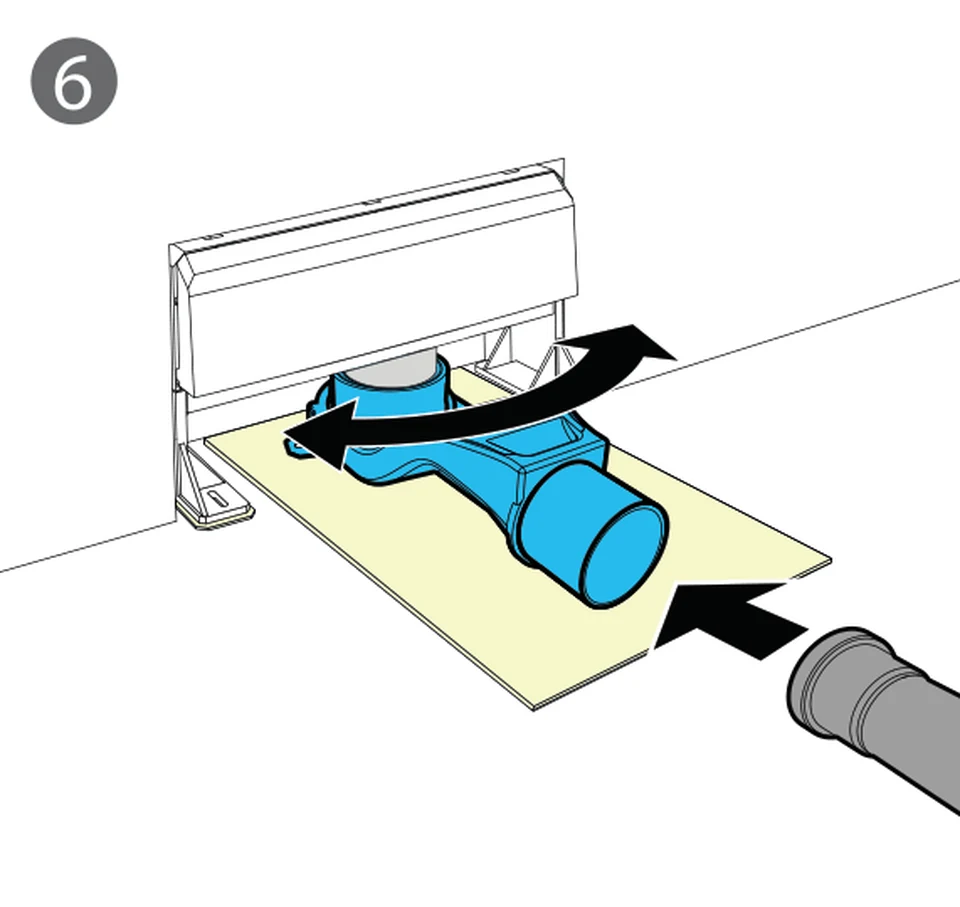
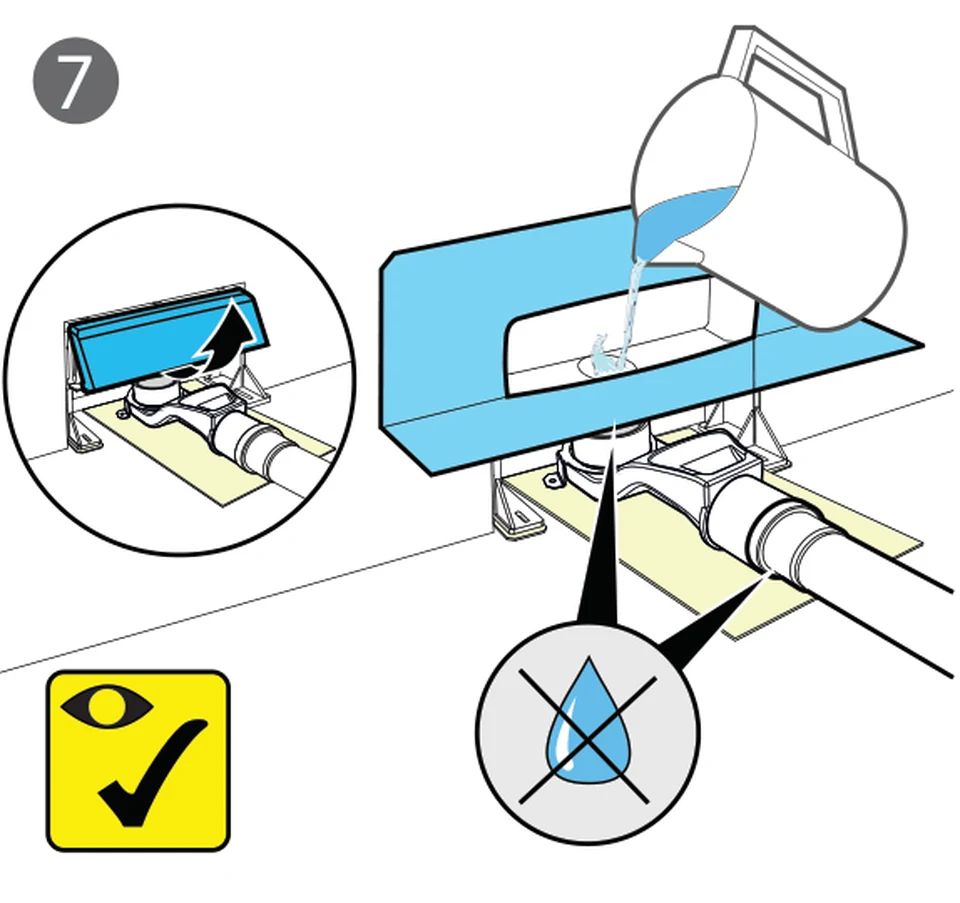
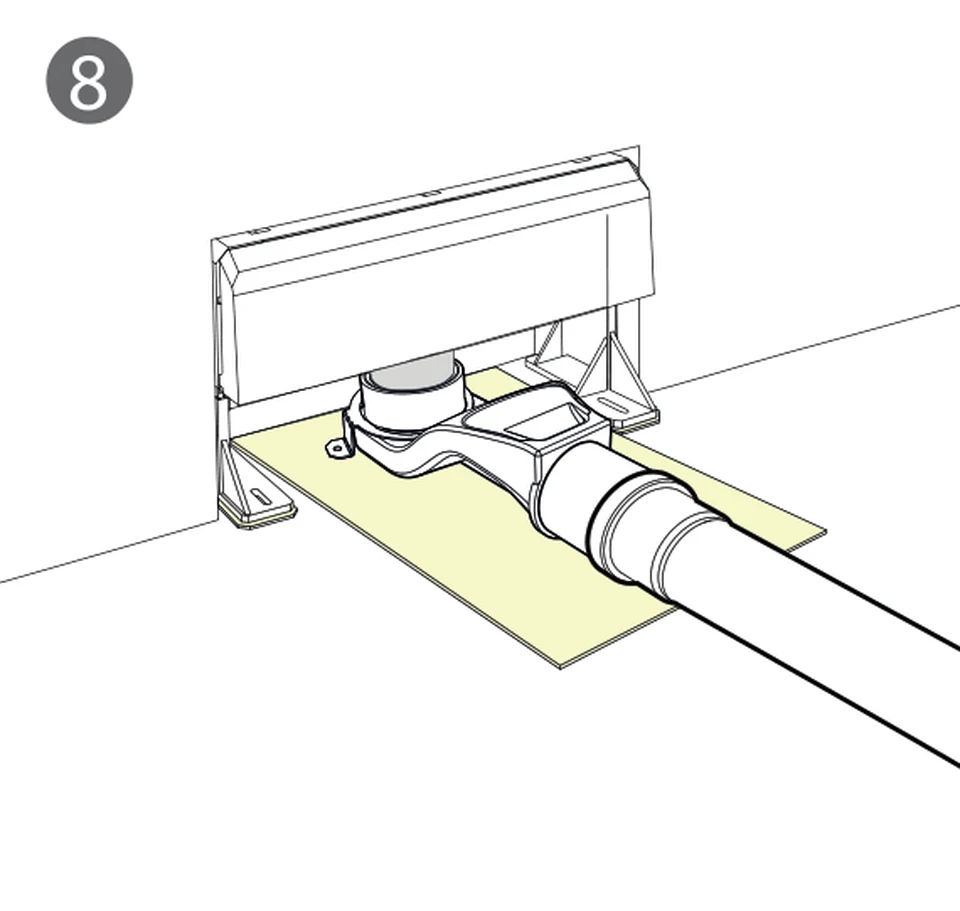
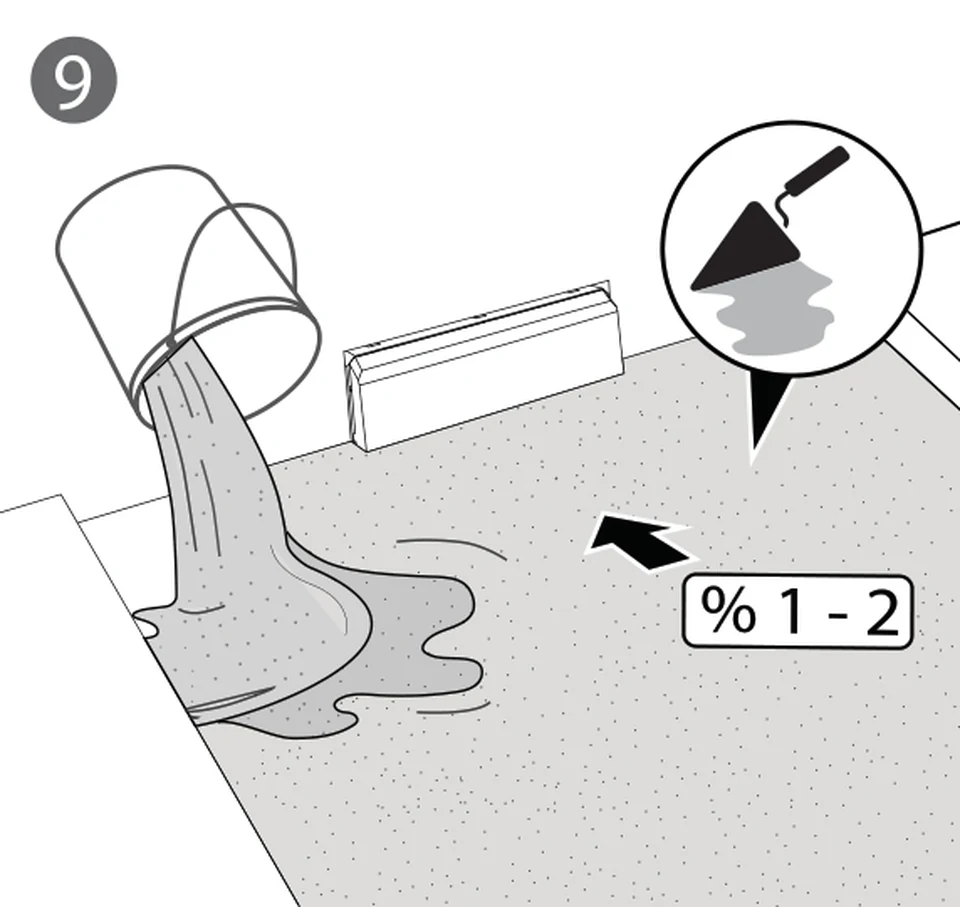
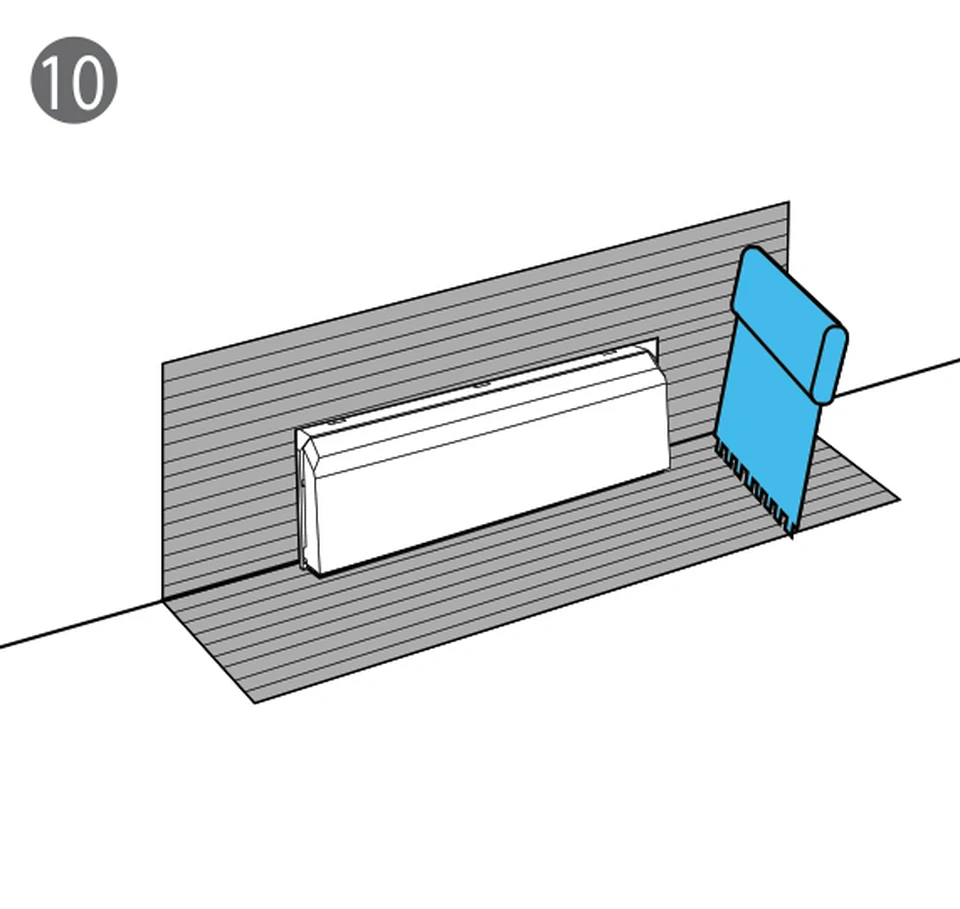
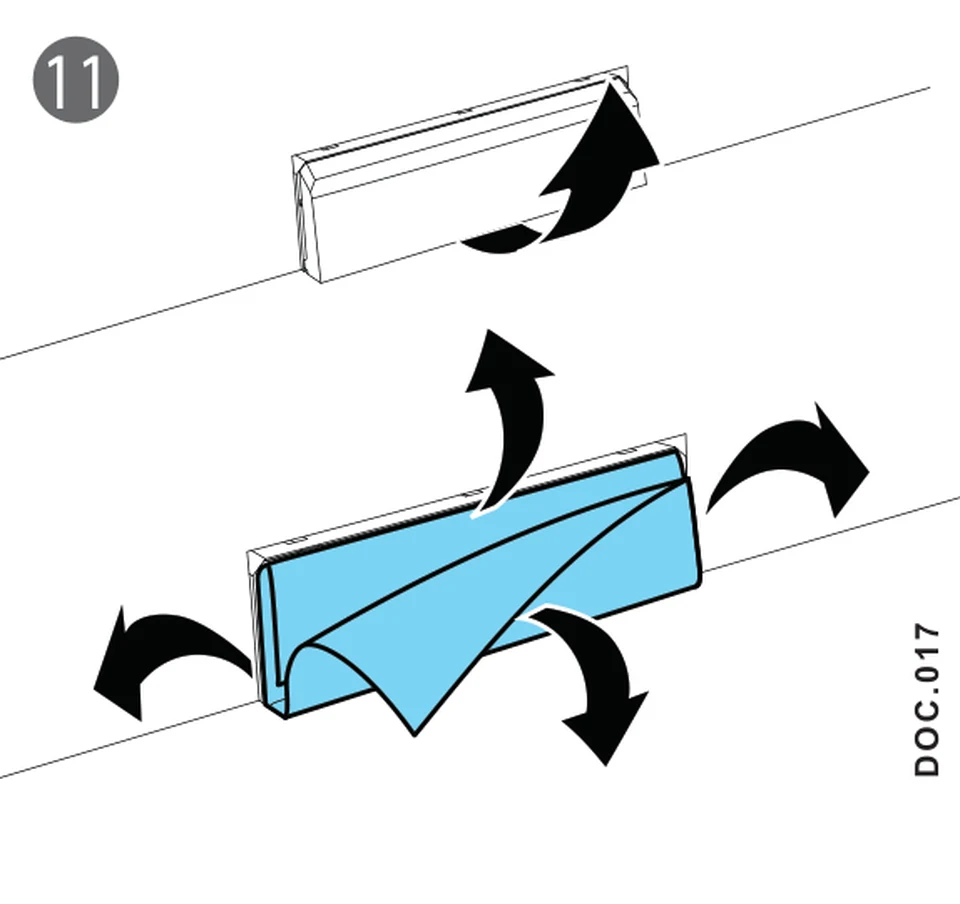
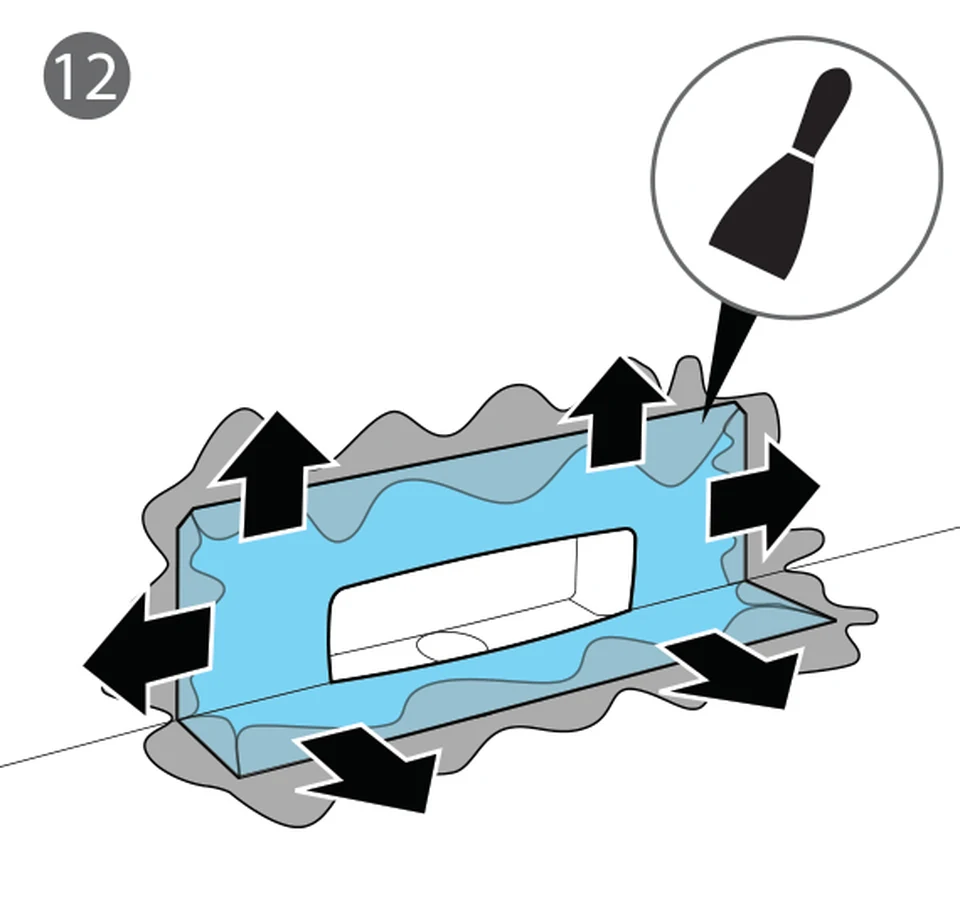
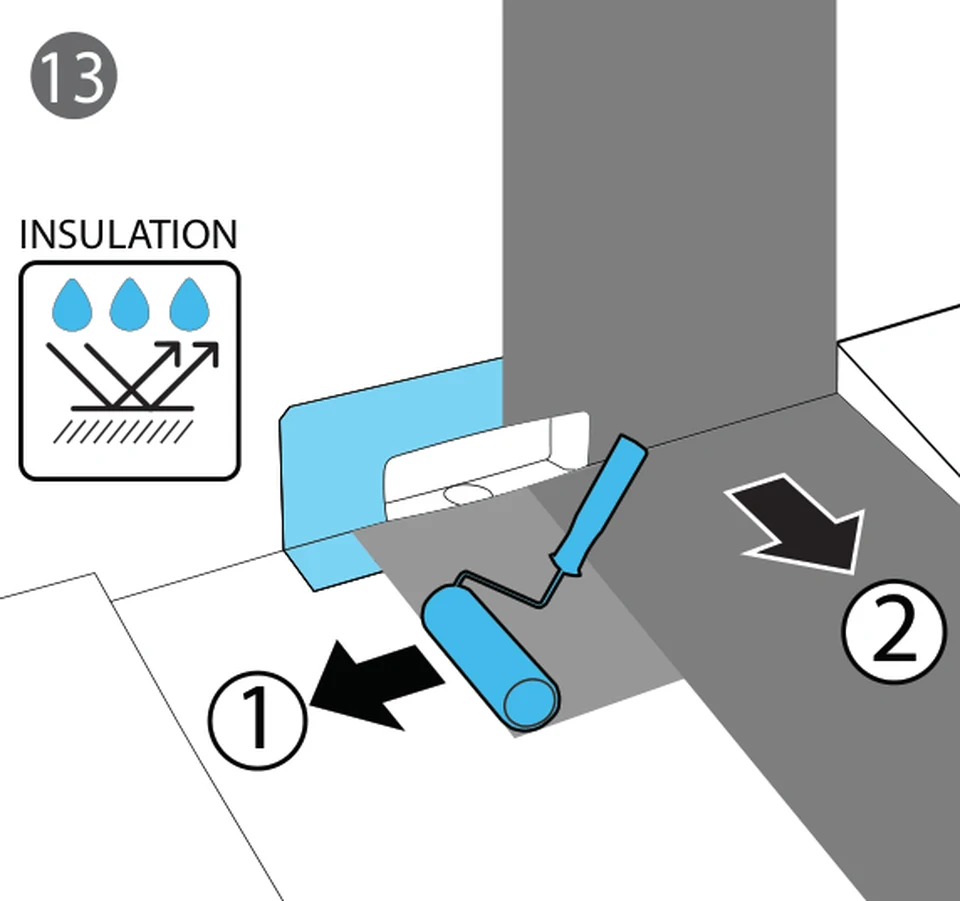
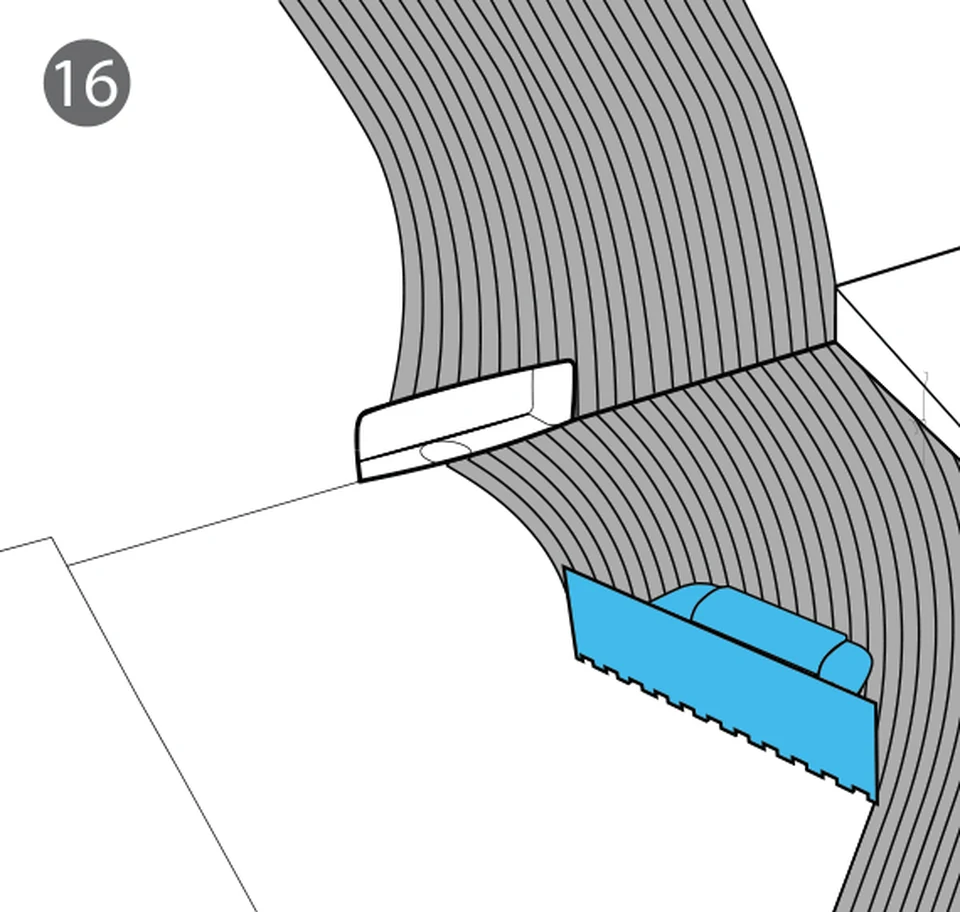
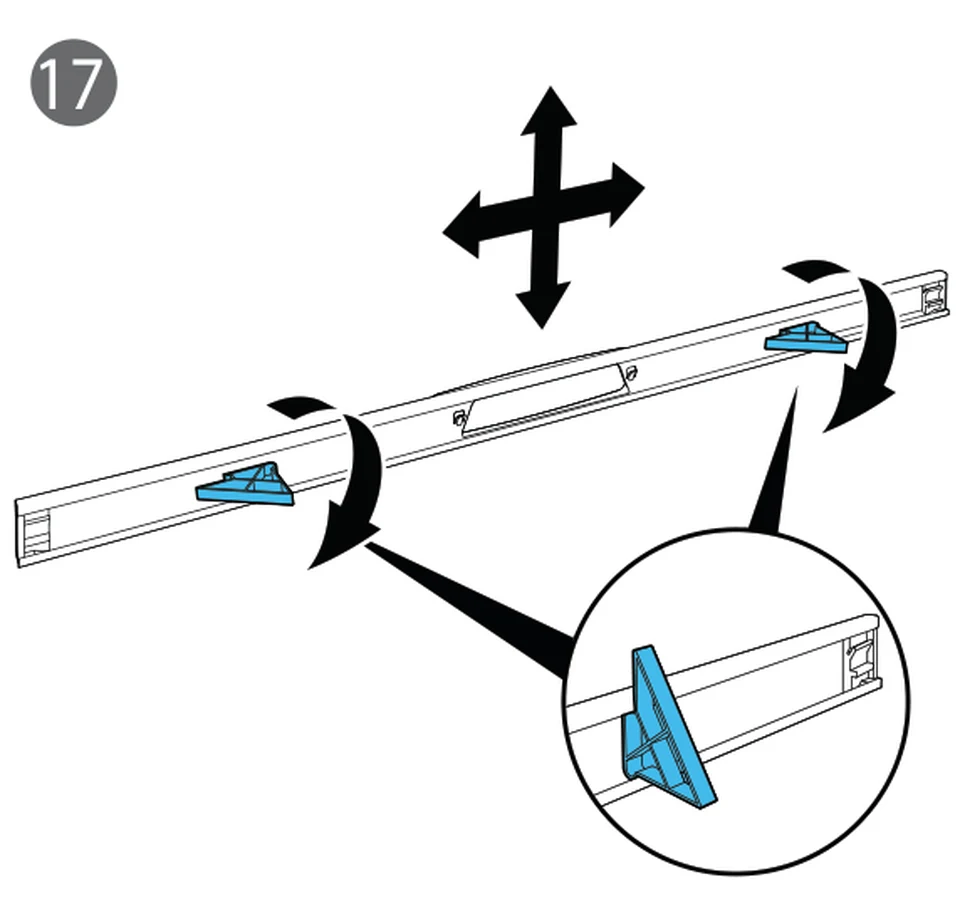
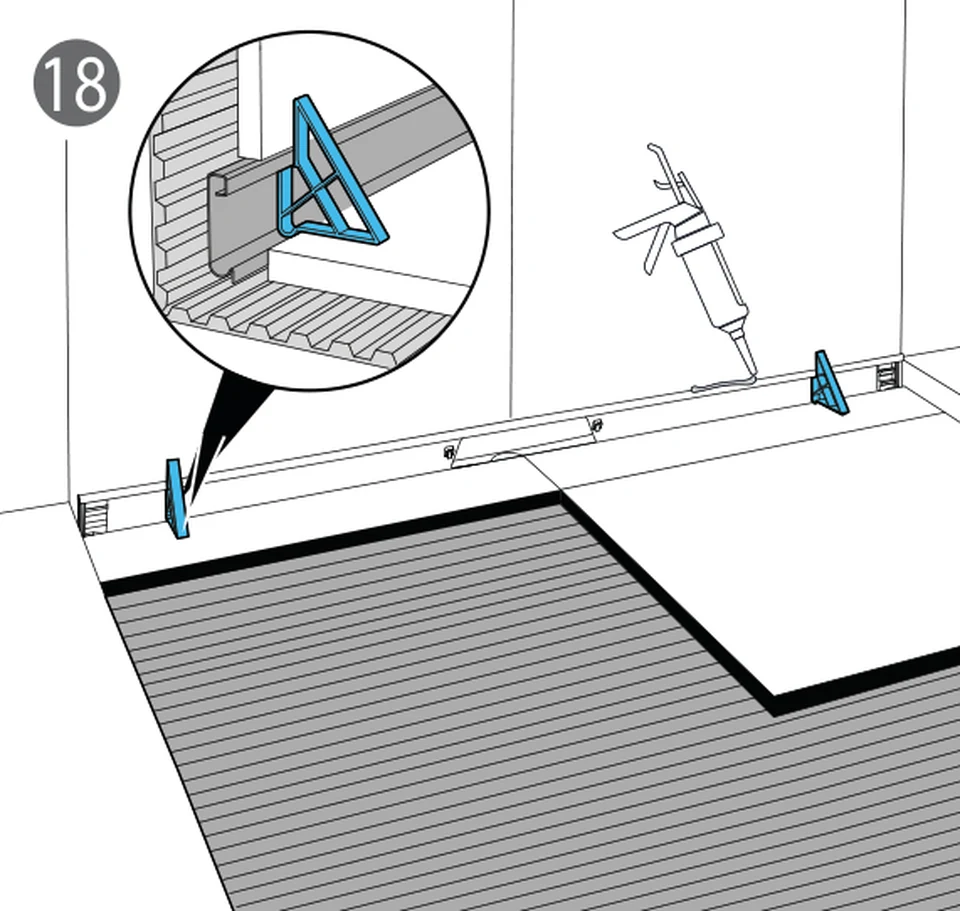
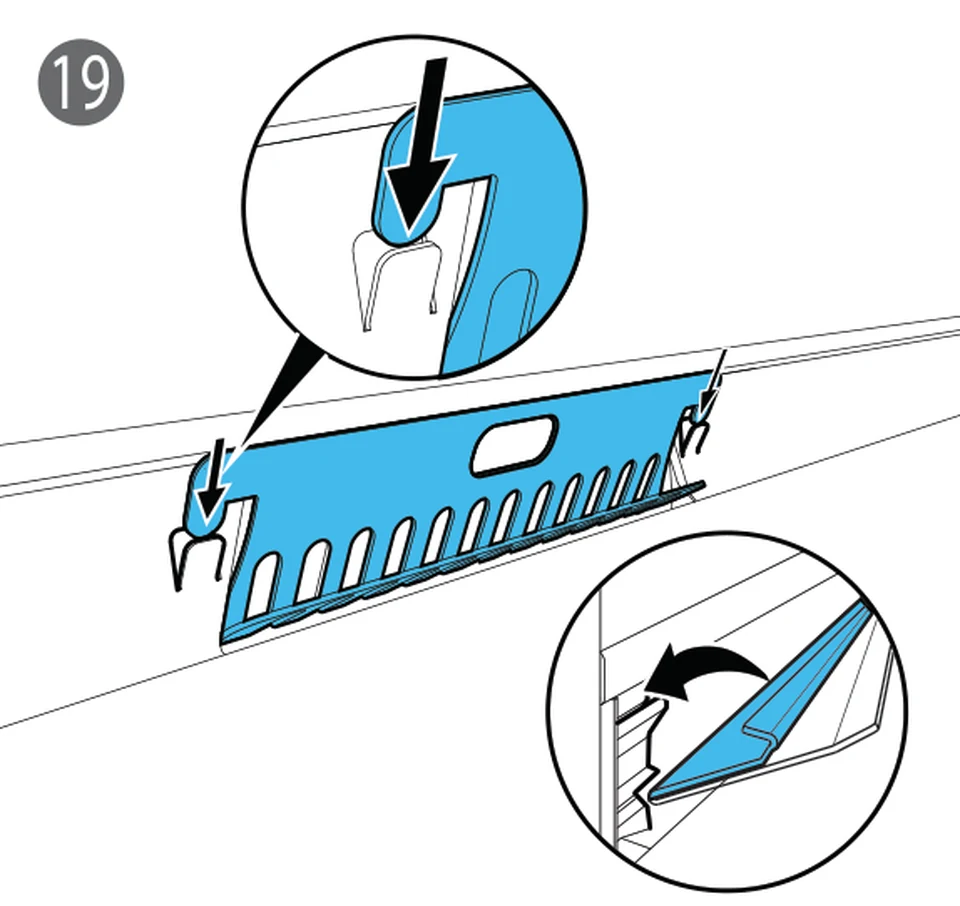
Installation step by step.
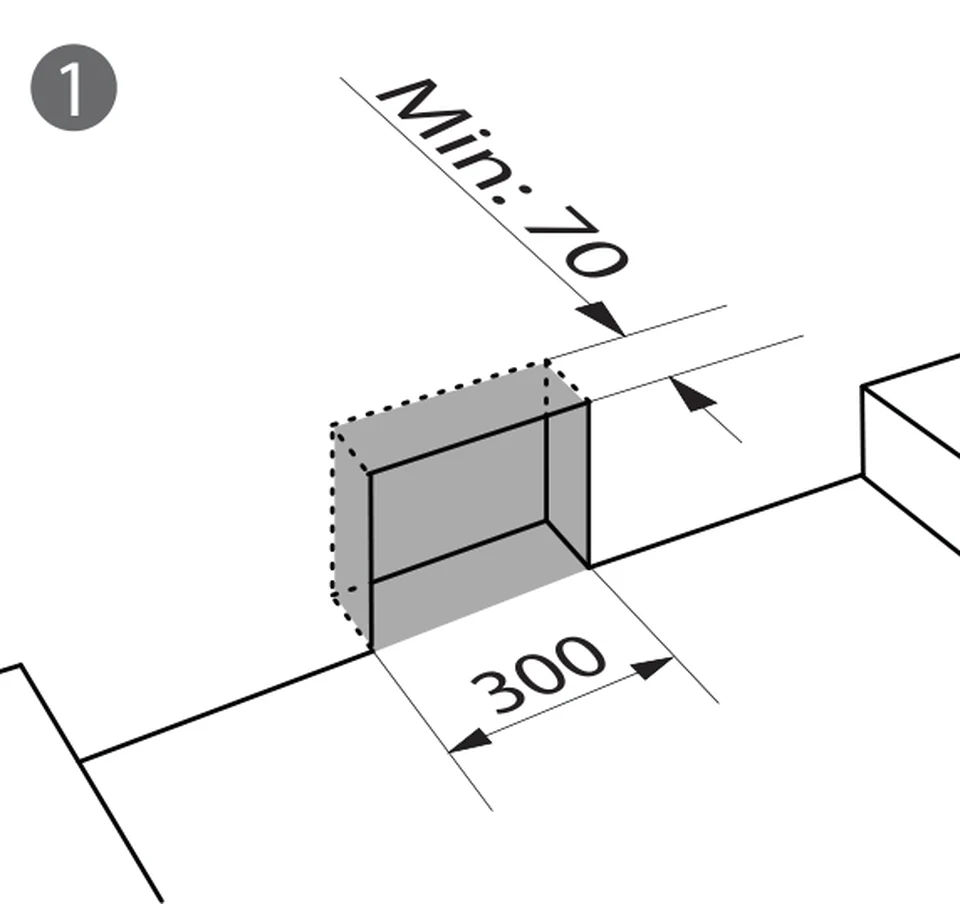
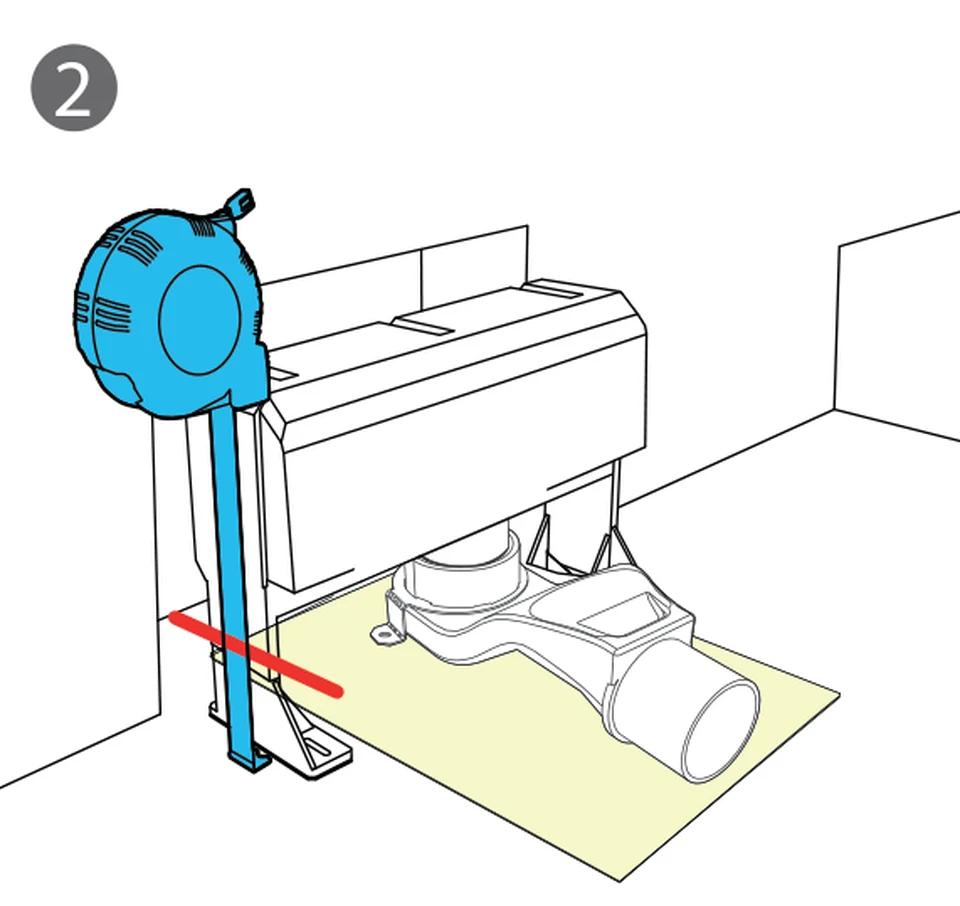
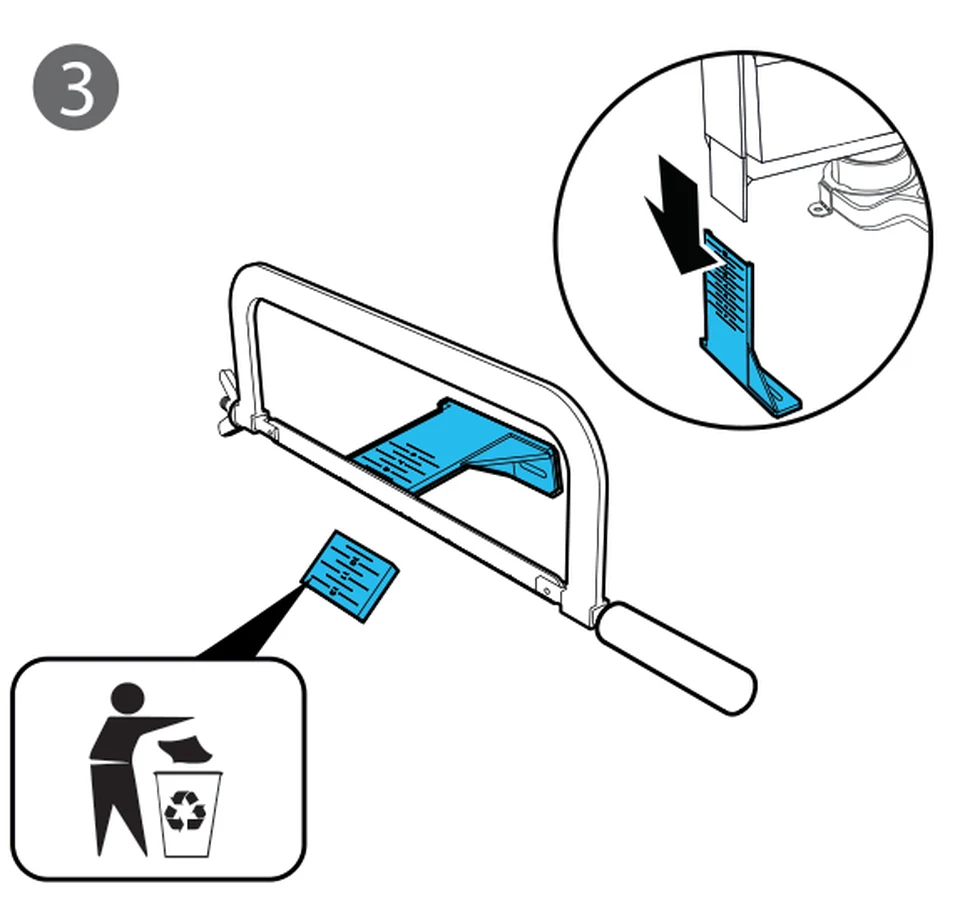
Nineteen steps from the wall opening to the finished joint. Click a step or let it run.
Frequently asked questions.
What makes Wall-In different from a floor channel?
Wall-In sits in the wall and runs from wall to wall, so the floor surface stays uninterrupted and no channel is visible in the tiled floor. The design is patented.
Which lengths is Wall-In available in?
80, 100 and 120 cm. It can be cut on site down to 30 cm.
Which build height does Wall-In need?
From 60 mm, measured from the top of the raw floor.
How is Wall-In levelled?
With a patented eccentric flange for fine levelling. The drain body adapts to the tile thickness.
Is Wall-In suitable for bonded waterproofing?
Yes. The waterproofing membrane is fitted at the factory. Wall-In is tested to EN 1253 and holds a German abP.
Which outlet does Wall-In have?
A DN 50 outlet with a trap.
Specification text for tenders.
Ready to paste into your bill of quantities (German, as used in German tenders).
Wandablauf Fabrikat Gruen, Typ Wall-In Imperia, oder gleichwertig, Ablaufkörper für den Einbau in die Vorwand, Rinne und Vollmetall-Abdeckung aus Edelstahl 1.4301 (V2A), gebürstet, vor Ort kürzbar bis 30 cm, mit patentiertem Exzenterflansch zur Feinjustierung, herausnehmbarem Haarsieb und Geruchsverschluss, Abgang DN 50, Aufbauhöhe 60–125 mm. Dichtmanschette werkseitig angebracht, für Verbundabdichtung geeignet. Geprüft nach EN 1253, abP. Länge ____ cm (80 / 100 / 120; 30 und 140 als Projektlänge). Art.-Nr. LW12-H24L___E_.
Copy text